


这是咱们设计得到和你共同交流探讨学习的第455期
如果你在工作中有任何困惑,欢迎在「问答区」留言,或许第二天解答的问题就是你的提问喔~
有问题,找设计得到

每日问答
问题:
CAD里如何设置A2加长图框打印?
设计得到解答:
在日常工作中有的项目会使用到加长图框,CAD的虚拟打印机本身是不带加长图框打印的设置,这时候就需要自己进行设置。
今天大家普及一下加长图框尺寸如何设置的,一般会按照1/8或者1/4倍数来设置。
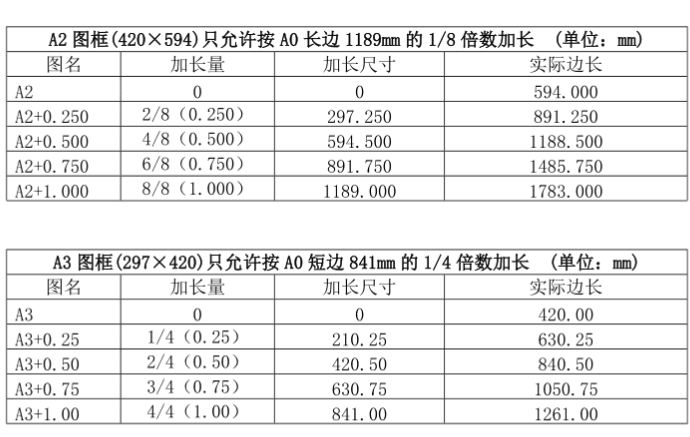
那接下来我们来看如何设置一个A2+的图框步骤:
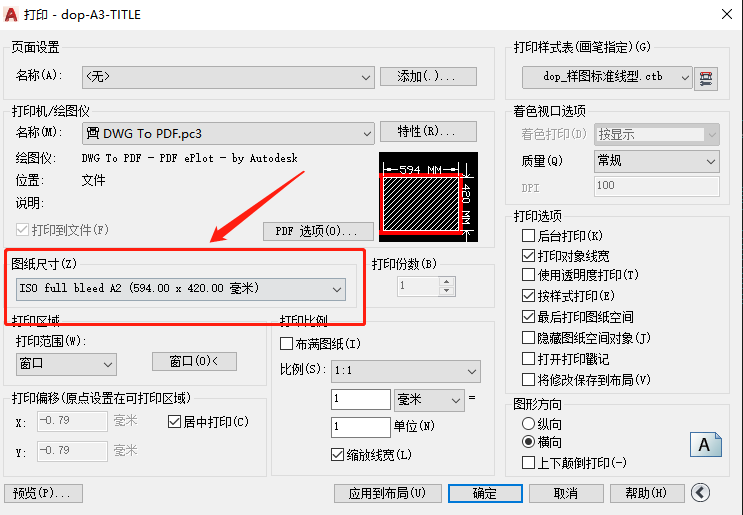
1、在打印输出界面,选择DWG To PDF打印机

2、选择图纸尺寸,可以先选择A2图框尺寸,接下来在此尺寸上面进行调整图纸尺寸。
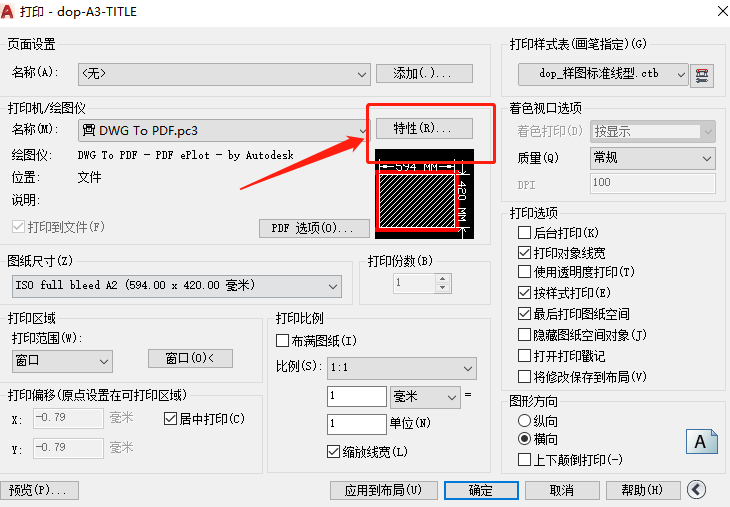
3、选择打印机特性
4、在设备和文档设置选在自定义图纸尺寸
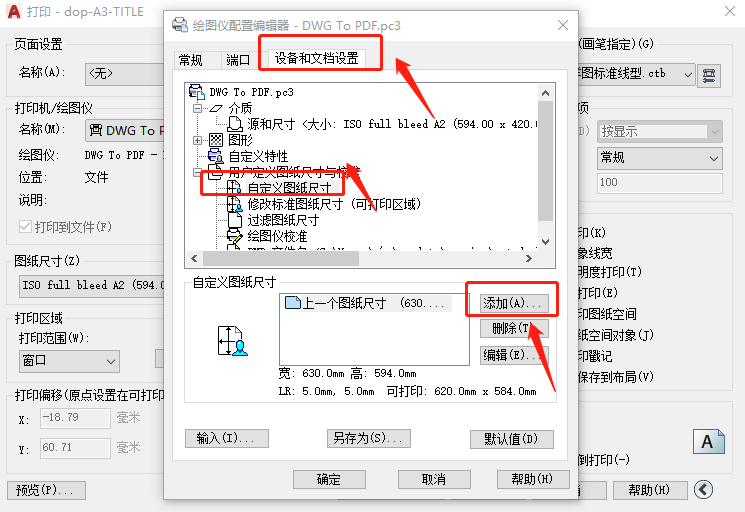
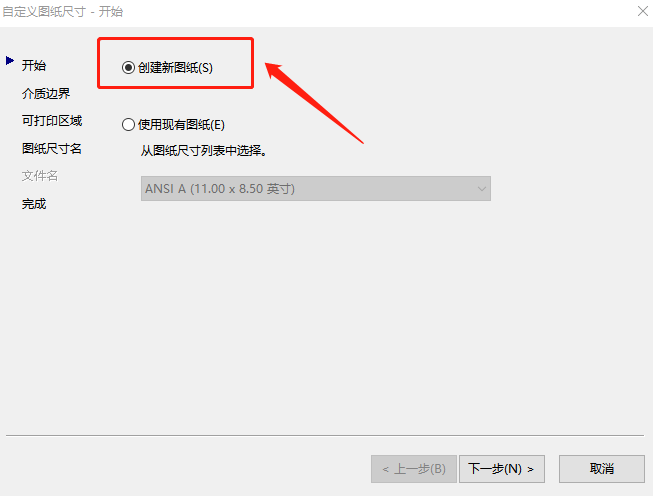
5、自定义图纸尺寸--创建新图纸
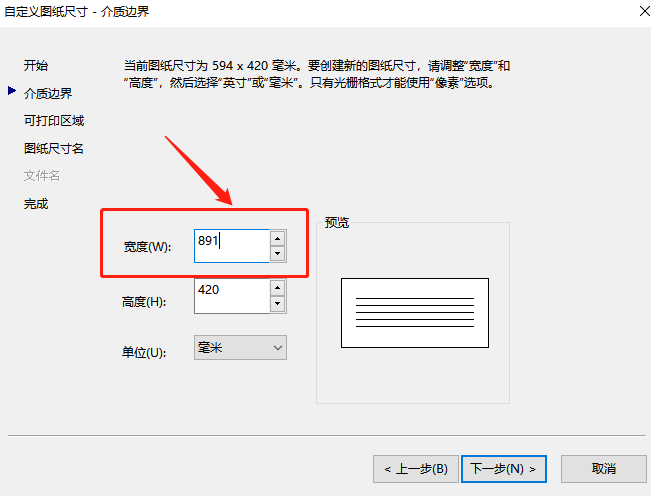
6、在介质边界里面调整宽度
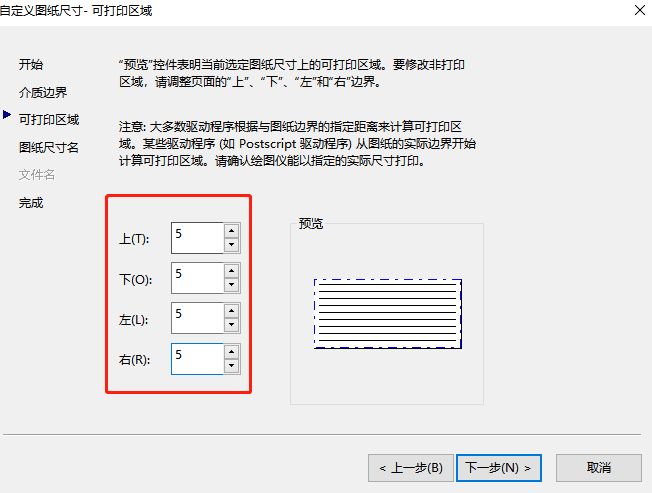
7、在打印区域里面设置页边距
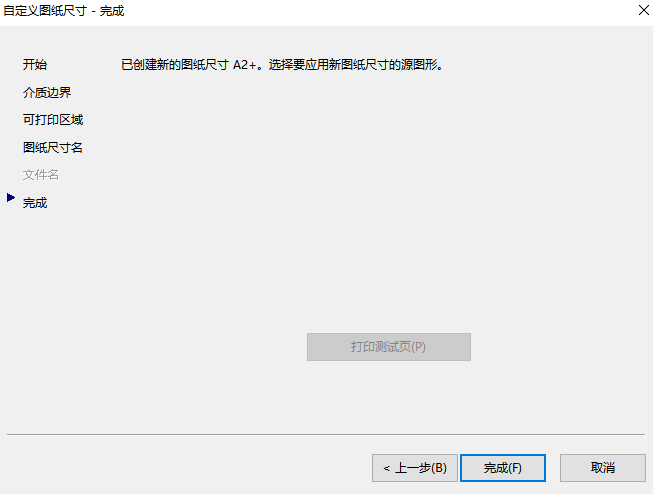
8、在图纸尺寸名里面编写新建打印尺寸名称
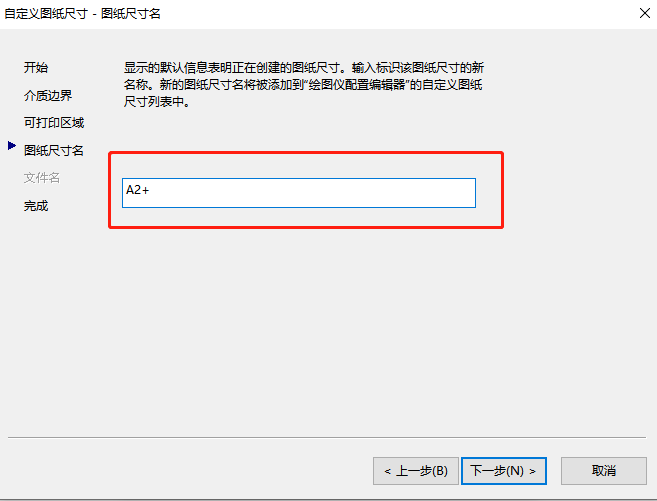
调整完名称,点击完成
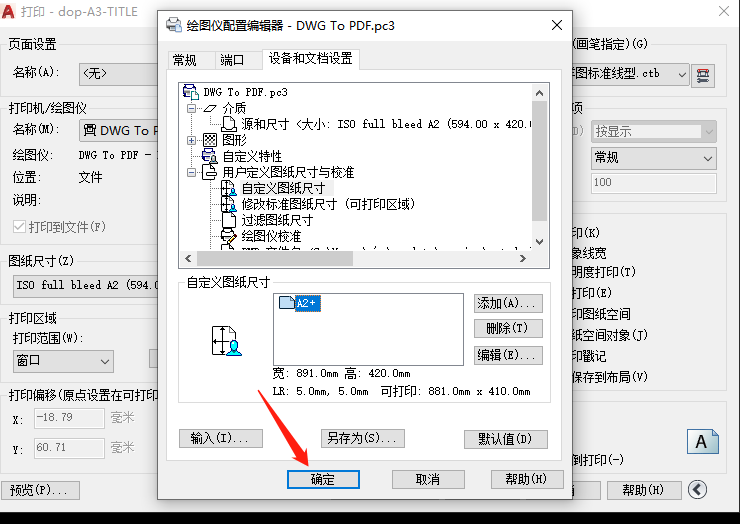
9、在绘图仪配置编辑器里面最终确定,这样就新建一个A2+的打印尺寸
10、选择修改打印机配文件--仅对当前打印应用修改
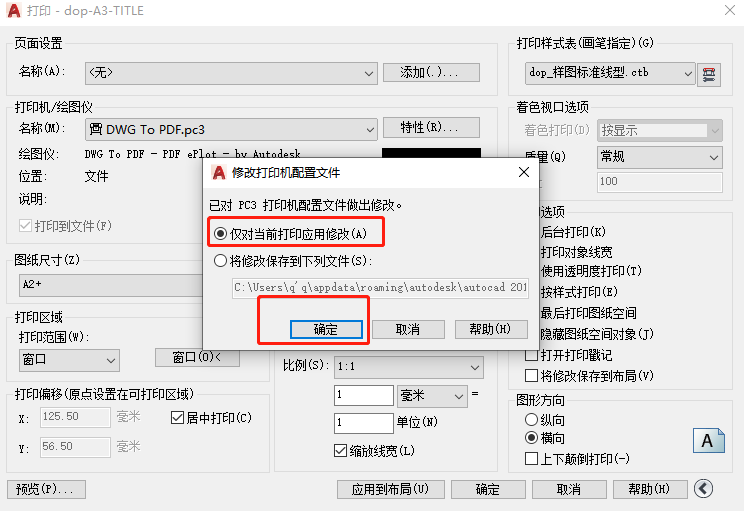
最后输出打印即可完成一个A2+的图框打印设置了。
更多有关CAD相关知识。欢迎登陆设计得到官网(www.shejidedao.cn)搜索“CAD”查看更多视频图文资料。
*以上部分图片源自网络,如有侵权请告知。
文章仅代表作者观点,如有不足欢迎指出。
有问题、如何向【设计得到】提问?
在下方评论区留下你的问题,即可
我们会在第一时间甄选有代表性的问题为你回答。
注:设计得到会员优先解答哦~

△扫码订阅会员,收货6000+知识点
END
设计得到,愿你每天都有收获

以下内容需要登录观看
登录
 复制链接
复制链接
 微信扫一扫
微信扫一扫

